How to connect VM using private key and SFTP in WinSCP ?
This tutorial guides you on how to connect VM using private key and SFTP in WinSCP. For our exercise let’s assume a virtual machine (VM) instance is up and running in Google cloud.
How to connect VM using private key and SFTP in WinSCP
Let’s say you have generated SSH keys (private and public keys) using some tools. For example, I have generated SSH keys using PuTTYgen and used the public key to setup SSH Keys for the VM instance running in Google Cloud.
Basically, I followed the steps mentioned in this article to Add or Remove Project-Wide SSH keys in the Google Cloud Platform for the VM instance.
Also, I saved the private key in local machine. Now, I am going to tell you how to use this private key in WinSCP to connect to the VM using private key via SFTP in WinSCP.
First, you need to download and install WinSCP using this link : Download WinSCP.
Next, open WinSCP and choose “New Site” so that you can enter session details. Choose “SFTP” from the “File protocol” dropdown.
Then enter “Host name” details. I have entered static ip (44.121.66.21) of the VM instance. And by default the port number will be 22 when you choose SFTP protocol. Do not change the port leave as it is as shown below.
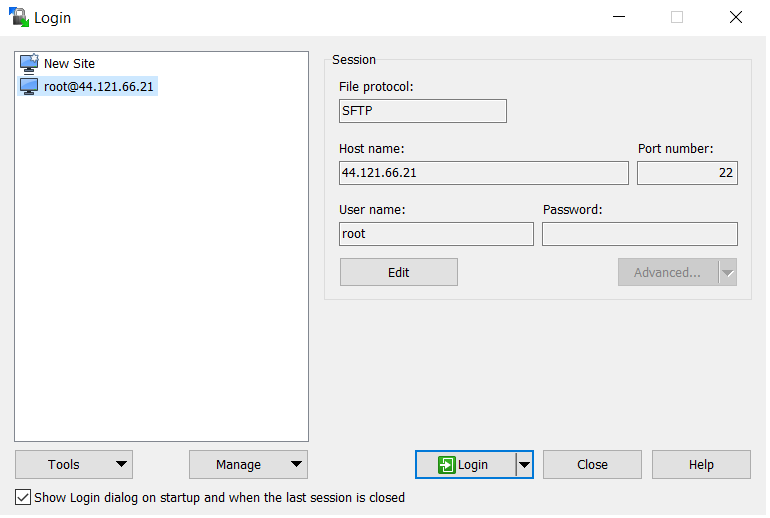
And you can mention username (root) using which you are going to connect or login.
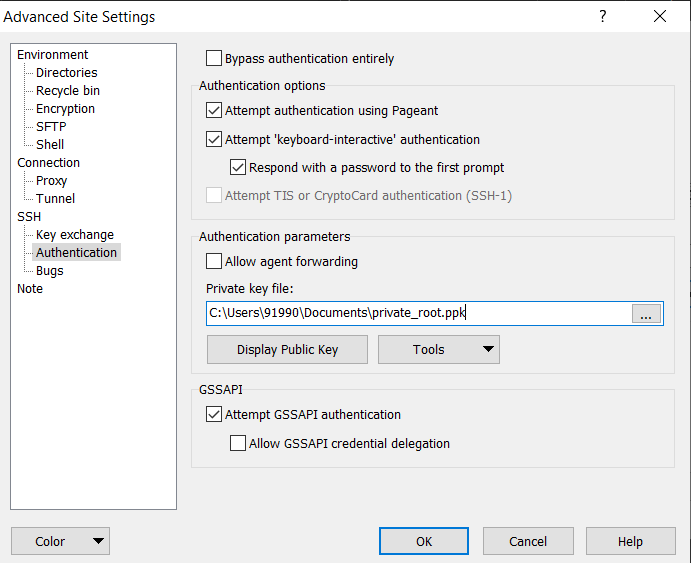
Then click “Edit” -> “Advanced” and select “Authentication” under “SSH” section. After that, browse for the private key (private_root.ppk) with which you are going to connect VM instance securely and click “Ok” as shown below.
Finally save the changes made and hit “Login” button to connect.
That’s it. You should be able to connect to virtual machine instance using private key generated via SFTP in WinSCP.
Hope it helped 🙂
- How to find which users belongs to a specific group in linux
- Docker: Error response from daemon: OCI runtime create failed: container_linux.go:349
- How to unzip a zip file from Terminal (Google Cloud Shell)
- Build a Docker Image with a Dockerfile and Cloud Build in GCP?
- How to create GCP project on Google Cloud Platform
- GCP Virtual Private Cloud (VPC) Networks Fundamentals
- How to create GCP project on Google Cloud Platform
- Is it possible to change Google Cloud Platform Project ID ?