How to install and configure VNC on Ubuntu 20.04 with graphical desktop?
This tutorial guides you on how to install and configure TightVNC Server on Ubuntu 20.04 with graphical desktop. Also, you will learn how to configure and connect it via a VNC Viewer to do remote desktop connections.
Install and configure VNC on Ubuntu 20.04
TightVNC is a free remote desktop application. Using this VNC tool you can view the desktop of a remote machine and can control it. Let’s see the steps that you need to follow to install and configure this VNC server on Ubuntu 20.04.
1: Install Desktop Environment
First, check whether your Ubuntu machine has graphical desktop environment or it is plain vanilla Linux server. If it is plain Vanilla server then you need to begin installing packages which will give you graphical interface for your Linux machine.
Initially, just update your list of packages.
$ sudo apt update
After updating list of packages, install Xfce desktop environment which is lightweight desktop environment for Linux Operating Systems.
$ sudo apt install xfce4 xfce4-goodies
2: Install VNC Server and setup secure password
Once the installation of desktop environment completed. Then you need to install TightVNC server using the following command.
$ sudo apt install tightvncserver
You must complete the initial configuration after installing VNC server to setup vncserver password. To setup secure vncserver password try to run the following command.
$ vncserver
After, running the above command you will see the following prompt to enter and verify the password.
Output
You will require a password to access your desktops.

Password:
Verify:
Once you verify the vnc password, you can also create view-only password (optional).
Output
Would you like to enter a view-only password (y/n)? n
xauth:  file /home/ubuntu/.Xauthority does not exist

New 'X' desktop is sneppets:1

Creating default startup script /home/ubuntu/.vnc/xstartup
Starting applications specified in /home/ubuntu/.vnc/xstartup
Log file is /home/ubuntu/.vnc/sneppets:1.log
Next, let’s learn how to configure VNC Server.
3: Configure VNC Server
Before you start configuring VNC Server you should learn about vnc display port. When the VNC is setup it will launch the default server instance on port 5901. This port is called as display port.
And VNC refers to these ports like :0, :1 etc.,. Therefore we can say that VNC server could launch multiple vnc sessions on display ports like :1, :2, :3 and so on.
For example, the following command lists TightVNC server sessions and display ports.
$ vncserver -list

TightVNC server sessions:

X DISPLAY #     PROCESS ID
:1              5684
:2              23698
If you wanted to change the VNC configuration, first stop the VNC Server sessions running on ports 5901 and 5902 using the following commands.
$ vncserver -kill :1
Killing Xtightvnc process ID 5684

$ vncserver -kill :2
Killing Xtightvnc process ID 23698
Before you modify the xstartup file under home/ubuntu/.vnc/ directory, first take the backup of that file.
$ mv ~/.vnc/xstartup ~/.vnc/xstartup.bak
After that, create new xstartup file and copy the contents mentioned below.
$ nano ~/.vnc/xstartup
#!/bin/bash
xrdb $HOME/.Xresources
startxfce4 &
Note, the first line or command is used to read the server user’s .Xresources file, where user could change graphical desktop settings like terminal color, font etc., And the second line or command is used to launch Xfce which is our graphical desktop environment.
Also, ensure that the new startup file that you had created have been made executable with the following command.
$ sudo chmod +x ~/.vnc/xstartup
After the configuration is done, you can restart the vncserver with the following command.
$ vncserver
Output
Output
New 'X' desktop is sneppets:1

Starting applications specified in /home/ubuntu/.vnc/xstartup
Log file is /home/ubuntu/.vnc/sneppets:1.log
Now let’s learn how to connect to VNC desktop.
4: Connect to VNC desktop
You can either connect directly using the IP address of the machine where VNC server is running and port 5901 or :1. Else, you can use SSH tunnel to connect securely to the VNC server.
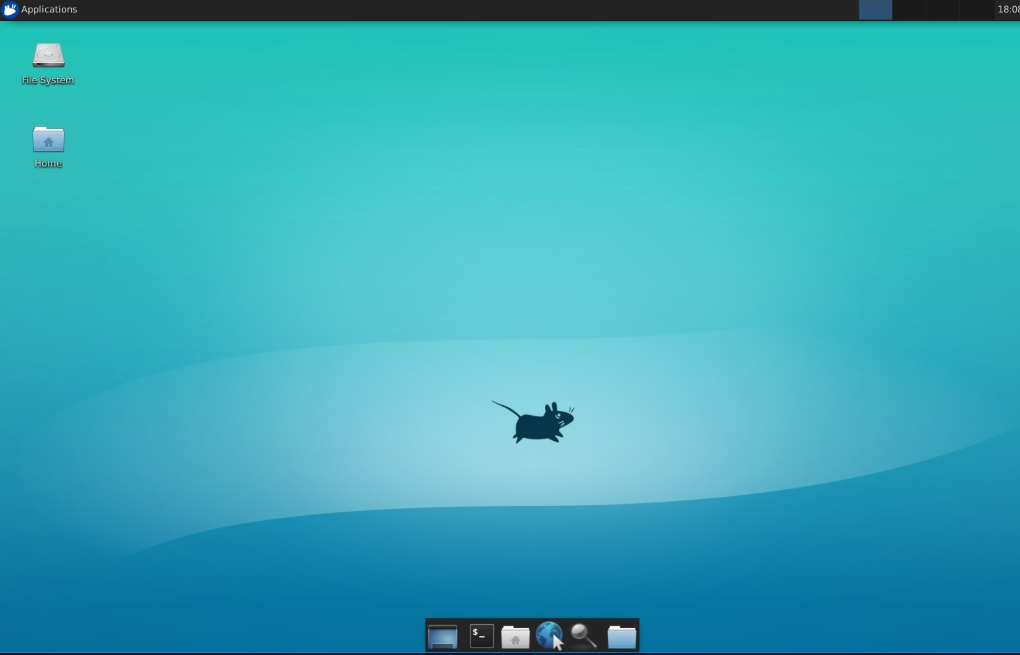
In this tutorial to keep it simple, I tried connecting using VNC Viewer to connect to 127.0.0.1:5901 or 127.0.0.1:1. You will be prompted to type VNC password that you had setup. After authentication is successful, you will see the default Xfce desktop as shown below.
Conclusion
That’s it these are the exact steps that I had followed to setup myself. You had learnt how to install and configure VNC Server on Ubuntu 20.04. Now you will be able to manage machine from remote using Xfce graphical desktop environment. Setting up secure SSH tunnel is not in scope of this tutorial. Hence I will try to cover that separately if needed.
Hope this article is useful 🙂
Also See:
- Set or change root password in Ubuntu Linux
- Linux: sudo: apt-get: command not found
- How to Start Stop Restart MariaDB on Linux OS ?
- Putty Fatal Error No supported authentication methods available
- How to find which users belongs to a specific group in linux
- Give write permissions for specific user or group for specific folder in linux
- How to unzip a zip file from Terminal (Google Cloud Shell)
- Build a Docker Image with a Dockerfile and Cloud Build in GCP?
- How to create GCP project on Google Cloud Platform
- MariaDB – How to set max_connections permanently ?
- How to create GCP project on Google Cloud Platform
- Is it possible to change Google Cloud Platform Project ID ?
- Create non-root SSH user account and provide access to specific folders
- MySQL : How to grant all privileges to the user on database ?
- How to install OpenJDK 11 in Ubuntu Machine ?
- Amazon Linux AMI : apt-get command not found
- How to get the first and last element of a list in Python ?
- Connect to Github using SSH ?
- Check OS version in Linux from command line ?
- Error: You’ll have to kill the Xvnc process manually
- Install GUI or graphical desktop environment on Ubuntu Server ?