How data binding works in Angular 9 ?
This tutorial guides you on how data binding works in Angular 9. Data binding in Angular JS is the communication between the model and the view. Let’s see more in detail about data binding with examples.
Data binding in Angular 9
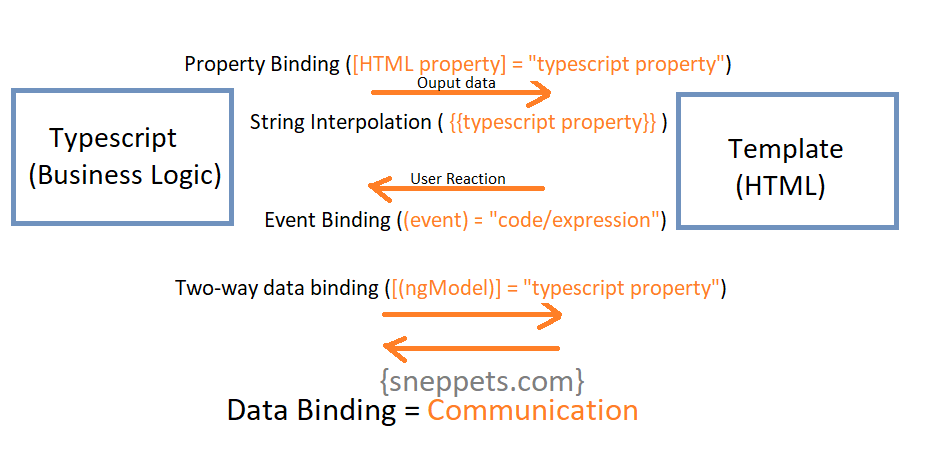
Data binding is the synchronization or communication between typescript code (Data Model business logic) of your angular component and the template code (HTML View). Because you might have some result from your typescript code as it may fetch some data from server or performed some calculation.
Actually, here output data is kind of dynamic and not hard-coded in to the template code (HTML View). There are two types of data binding available. They are one-way data binding (String Interpolation, Property Binding, Event Binding) and two-way data binding as represented in the following diagram.
String Interpolation – One-Way Data Binding Angular 9
String interpolation is used to display output data from data model (typescript code) to HTML view (template). It fetch data from/via component.ts file and display dynamically on HTML template (component.html file).
Data Model – Typescript Code
The below is an example data model; server. A data model is a collection of data available for angular application.
server.component.ts
import { Component } from '@angular/core';

@Component({

	selector:'app-server',
	templateUrl:'./server.component.html'
})

export class ServerComponent {

	serverId: number = 2;
	serverStatus: string = 'offline';

	getServerStatus(){
		return this.serverStatus;
	}

}
HTML View – Template
HTML View is a view where Angular 9 application is displayed. The HTML view has access to data model.
And there are several ways to display data model in view. In case of String Interpolation we need to use double braces {{ }} to display the content from the data model as shown below.
server.component.html
Assume this is the template or HTML view for server component.
<p>{{'Server'}} with ID {{serverId}} is {{getServerStatus()}}</p>
app.component.html
This is the template or HTML view for root component or app component.
<app-server></app-server>
Output
Server with ID 10 is offline
Note, String interpolation will resolve to string output in the end whether the declared parameter type is either number (serverID) or string (Server).
Property Binding – One-Way Data Binding Angular 9
Property binding is another example for one-way data binding. You can either use string interpolation or property binding in many situations based on your requirement.
Let’s see an example for property binding. Add new typescript property “isRefreshAllowed” in your typescript file “server.component.ts” and set it to false by default as shown below.
import { Component } from '@angular/core';

@Component({

	selector:'app-server',
	templateUrl:'./server.component.html'
})

export class ServerComponent {

	isRefreshAllowed = false;
	serverId: number = 10;
	serverStatus: string = 'offline';

	getServerStatus(){
		return this.serverStatus;
	}

}
Instead of hardcoding disabled property in your template (server.component.html) like below
<p>{{'Server'}} with ID {{serverId}} is {{getServerStatus()}}</p>
<button class="btn btn-primary" disabled>Refresh</button>
We can actually bind this “disabled” property in your HTML to an typescript property (isRefreshAllowed) by enclosing it in a square brackets as shown below.
<p>{{'Server'}} with ID {{serverId}} is {{getServerStatus()}}</p>
<button class="btn btn-primary" [disabled]="!isRefreshAllowed">Refresh</button>
Output
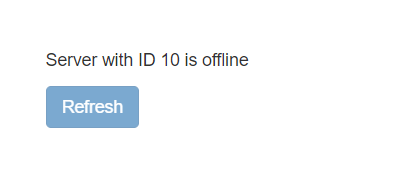
So that the disabled property will be more dynamic based on the typescript property boolean value.
Square bracket indicates Angular that property binding is used here and we want to dynamically bind some property to the HTML element in the DOM during runtime.
Note, besides binding typescript property to HTML element property as shown above, you can bind other properties like directives and your own components.
Event Binding – One-Way Data Binding Angular 9
Event binding in Angular consists of target event name (“click” within parenthesis) on the left hand side of the equal sign, and a quoted template statement on the right (onServerRefresh()) as shown in the below example.
<button class="btn btn-primary" [disabled]="!isRefreshAllowed" (click)="onServerRefresh()">Refresh</button>
In case of event binding though it’s of type one-way data binding, but the communication happens from the template to typescript class when event (user-initiated) occurs in the template.
Let’s modify our server.component.html file as shown below. Please note, for events, you don’t bind to onclick but only to click.
<p>{{'Server'}} with ID {{serverId}} is {{getServerStatus()}}</p>
<p>{{ serverRefreshStatus }}</p>
<button class="btn btn-primary" [disabled]="!isRefreshAllowed" (click)="onServerRefresh()">Refresh</button>
And modify your typescript file “server.component.ts” as shown below.
import { Component } from '@angular/core';
@Component({
selector:'app-server',
templateUrl:'./server.component.html'
})
export class ServerComponent {
isRefreshAllowed = false;
serverRefreshStatus = 'Server was not refreshed!';
serverId: number = 10;
serverStatus: string = 'offline';
constructor() {
setTimeout(() => {
this.isRefreshAllowed = true;
}, 3000);
}
getServerStatus(){
return this.serverStatus;
}
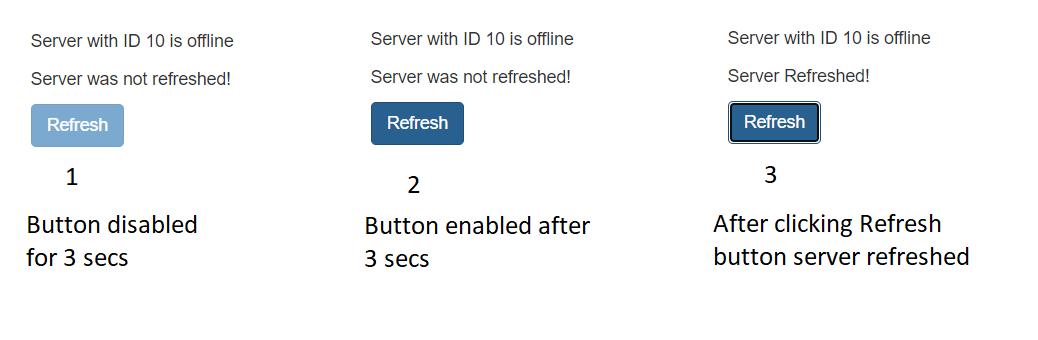
onServerRefresh(){
this.serverRefreshStatus = 'Server Refreshed!';
}
}
Output
Two-Way Data Binding Angular 9
Two-way data binding allows you to communicate from typescript class to HTML view and vice versa i.e., the combination of both ways that we discussed above.
In two-way data binding automatic synchronization of data takes place between data model and the HTML view. Hence, the changes would be observed on the both sides.
In this approach it is always ensured that typescript code and HTML view is updated all the time immediately and automatically.
Syntax:
[(ngModel)] = "typescript property"
Also See:
- Create a new component in Angular 9 with CLI and without CLI
- How to include Bootstrap to your Angular 9 Project ?
- Store access token in Ionic Angular App local storage securely
- Angular TypeScript Vs ES6 Vs ES5
- How to change angular port from 4200 to some other port ?
- Different ways to include JavaScript in HTML and its Purpose
- Port 4200 is already in use while running ng serve Angular CLI command
- String Interpolation in Angular 9