Live Streaming using Amazon EC2 and Adobe Media Server
In this tutorial let’s see how to do live streaming using amazon EC2 and Adobe Media Server. Adobe Media Server is used as the platform for streaming HD video with good audio quality. This platform will help to deliver your live video directly to a target audience of almost any size.

Get started with amazon EC2:
You will primarily use AWS Management Console, a point-and-click web-based interface.
- Sign up for EC2 – AWS account.
- Sign in to the AWS Management Console and open the Amazon EC2 console at https://console.aws.amazon.com/ec2/ .
- From the navigation bar, select the region for the instance. You can also use the default region. Otherwise this choice is important because some EC2 resources can be shared between regions, while others cant. For example, if you’d like to connect your instance to an existing EBS volume, you must launch the instance in the same region as the volume.
- Click -> Launch instance – An instance is a virtual server in the cloud.
- Choose an Amazon Machine Image (AMI)
- Choose an Instance Type.You can select any one of the following instance type.1) An instance with the Free Usage Tier. Free Usage Tier enables you to launch and use an EC2 Micro instance free for 12 months. 2) An regular instance (not within the free usage tier). You will incur the standard EC2 usage fees for the instance till you terminate the instance.
- Review and Launch the instance.
- Select and existing key pair or create a new key pair.
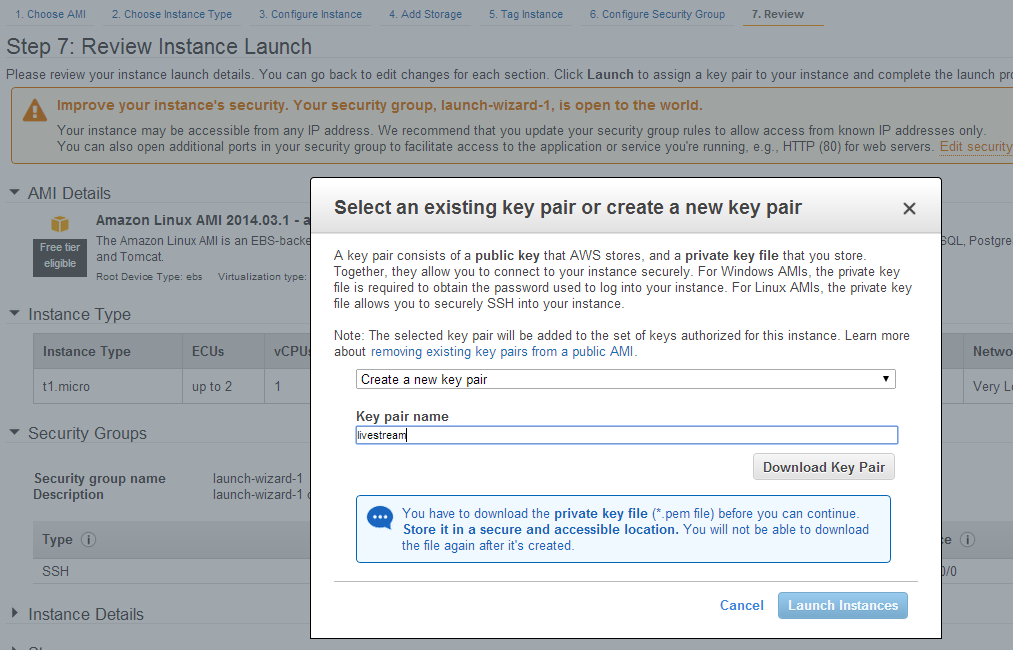
- If you want to create new key pair, choose create new key pair, then type a name for your key pair, then download. You’ll need the contents of the private key to connect to your instance after you launch it. Amazon Web Services doesn’t have the private portion of a key pair.
- Save your private key in a safe place on your computer. Note the location because you’ll need the key to connect to your instance.
- Note: If you launch your instance without a key pair, you can’t connect to it.
- Then click Launch Instances. You will get the Launch status like : “Your instance is now launching”.
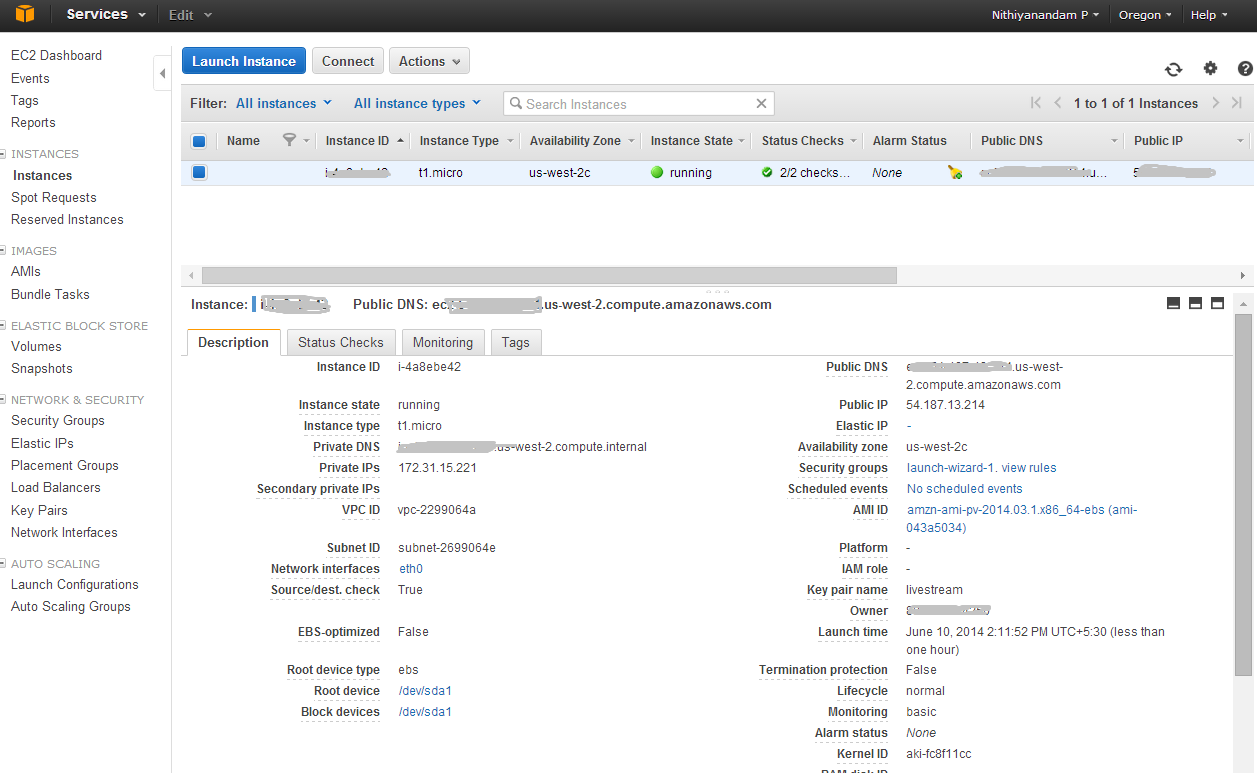
- Your instance will be launching and it may take few minutes to be in running state. Then it will be ready to use. Usage hours on your new instance will start immediately and will continue to count usage hours until you stop or terminate your instance.
- Click View Instances to monitor your instance’s status.
- (Optional) Create an elastic IP address: With an EIP, you can mask the failure of an instance or software by rapidly remapping the address to another instance in your account. And this Elastic IP is associated with your AWS account and not associated to particular instance. And it remains associated until you release it.
- (Optional) Create a cloud watch alarm to monitor your instance.
- Clean up.
Live HTTP Streaming using EC2 and Adobe Media Server:
We have seen how to launch EC2 instances. Now we will see the process of configuring live stream with Adobe Media Server.
Done Steps:
- AWS (Amazon Web Services) account is created.
- An EC2 instance is launched in the cloud.
- Amazon EC2 key pair created.
What to do Next :
- Running Adobe Media Server on AWS: Go to Subscribe to Adobe Media Server.
- Click place your order.
- Note: Check if you already running Adobe Media Server and you have subscribed for the same. If yes, cancel your Amazon DevPay subscription to Adobe Media Server. Otherwise, you will continue to be billed $5 /month for the old subscription as well.
- Create an AWS CloudFormation stack for Live Streaming.
- Verify that Adobe Media Server is running.
- Setup Adobe Flash Media Live Encoder to publish Live Stream.
- Download and install Flash Media Live Encoder.
- Open the Flash Media Live Encoder config.xml file in a text editor.
- In config.xml, set the value of the following <enable> element to true:
<flashmedialiveencoder_config>
   ...
   <mbrconfig>
      <streamsynchronization>
         ...
         <!-- "true" to enable this feature, "false" to disable. -->
         <enable>true<enable>
- Run Flash Media Live Encoder.
- On the encoding options tab try to do configurations as shown in the figure. Connect cam, choose device and enter FMS url as shown then click connect.
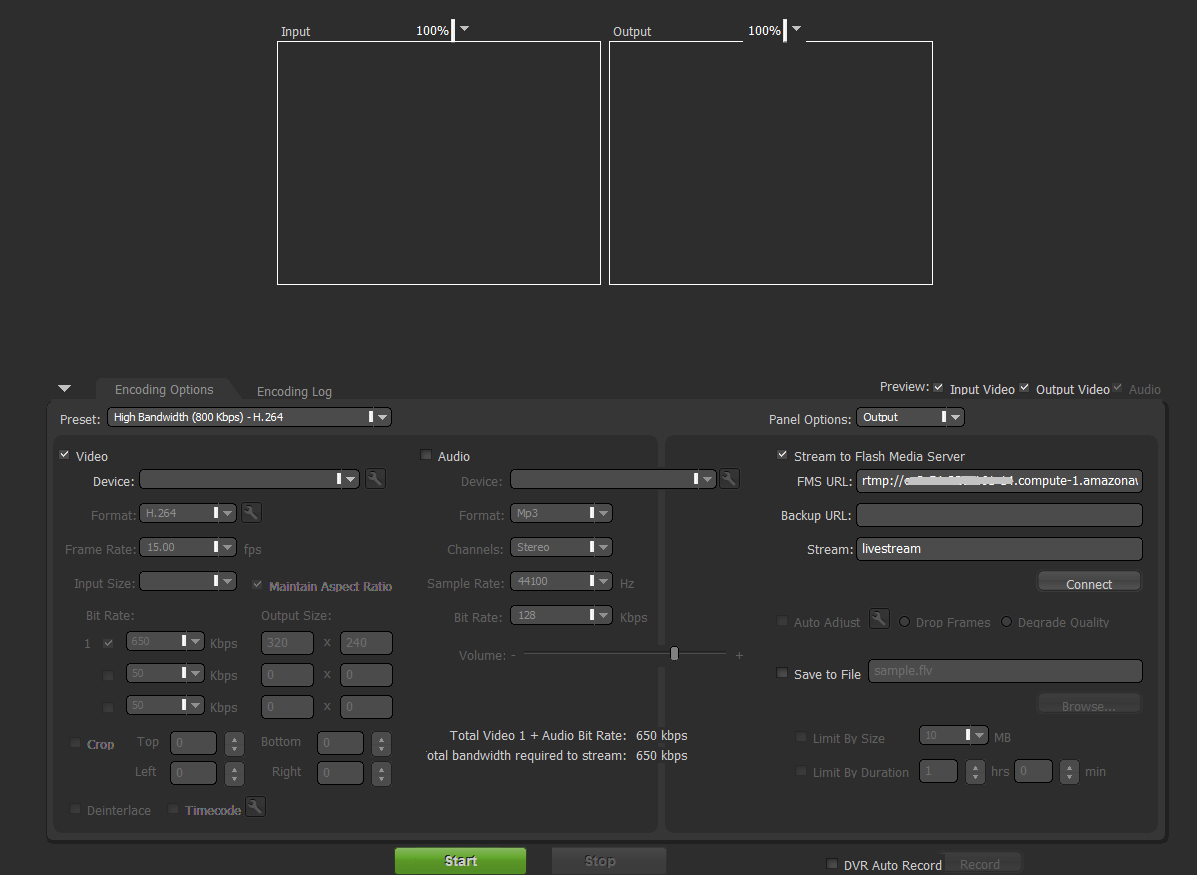
Finally
- Then click start. You are done and started streaming to Adobe Media Server running in amazon EC2 instance.
- Embed Flash Media Playback for an Amazon CloudFront Live HTTP Stream in a Web Application.
- Delete AWS CloudFormation Stack for Live Streaming.
- If you do not plan to use live streaming again soon, you can cancel your subscription to Adobe Media Server on Amazon EC2.
Thanks it helped.